How to Use the Microsoft Snipping Tool to Take a Screenshot
When it comes to taking an image of what’s on your screen in Windows, you only have a few options.
You could capture the screen by pressing the Print Screen button on the keyboard, but this option can be cumbersome, particularly when there are items open on your desktop that you don’t want to share in your image. When this happens, you’ll have to take the time to crop and edit your screenshot before you share it.
However, somewhere along the way (around the time of Windows Vista), Microsoft got smart, and realized that the Print Screen option just wasn’t enough. So a new tool was introduced – the Microsoft Snipping Tool, and creating screen shots became a whole lot easier.
What is the Snipping Tool?
The Snipping Tool is an application that is included with Windows Vista, 7, and 8, that allows you to take image snapshots of what’s on your screen. However, unlike Print Screen that takes an image of everything on the screen, the Snipping Tool allows you to narrow in on the exact area you want to capture, letting you be precise with your screen captures.
Where Can I Get the Snipping Tool?
If you are running Windows 7 or 8, click on Start and type in Snipping Tool. Click the program that appears on the list to open it. Once the program is open, right click on the icon on the taskbar, and select Pin to Taskbar to put this icon permanently on the taskbar so that it’s easily accessible.
In Windows Vista, you may have to activate the program first, before you can use it. To see if it’s already active, go to Start, All Programs, Accessories, Snipping Tool. If you don’t see the program in the Accessories list, go to Control Panel, Programs and Features, click on Turn Windows Features On Or Off, Tablet PC Optional Components, and then activate the Snipping Tool.
For all other versions of Windows, including XP, you’ll have to download the program from its original creator, CodePlex.
How Do I Use the Snipping Tool to Take a Screenshot?
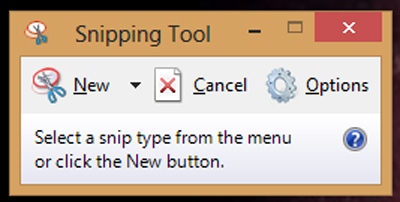
Using the Snipping Tool is quite easy. When you first open the program, you only have a few options: New, Cancel, or Options.
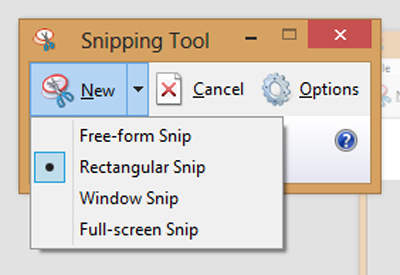
New allows you to take a new screenshot of anything you want. How the New button responds depends on which option is selected. To select a different option, click on the drop down arrow next to New, and select a new snip type.
Snip types change the way the screenshot function works. Here is a brief explanation of the snip type options, and what they do:
Free-form Snip: When selected, your snip icon appears as a pair of scissors. With the left mouse button held down, drag the scissors around the area you want to take a snapshot of. A red line will appear, showing you what you’ve circled. To take a snapshot, let go of the mouse button. You will be returned to the Snipping Tool, with an image of what you snipped appearing in the program.
This function is great if you just have a small area to snip, but can be cumbersome if you don’t have a steady hand.
Rectangular Snip: The program defaults to this function. When you click New, the snip icon appears as a +. With the left mouse button held down, drag the plus around the area you want to capture, and a red box appears. When you let go of the mouse button, you will be returned to the Snipping Tool, where it shows an image of what you just snipped.
This function is the easiest for taking quick snapshots of an error message, or something else small and rectangular on the screen.
Window Snip: When you want to take a screenshot of an active window, instead of the entire screen, use this function.
This function works well for capturing browser windows or dialog boxes.
Full-Screen Snip: This function works exactly like Print Screen. Just click anywhere on the screen, and then entire screen appears in the Snipping Tool window. Great for taking quick, full sized screenshots.
This function works great for capturing an entire screen, such as your desktop.
Other Snipping Tool Options
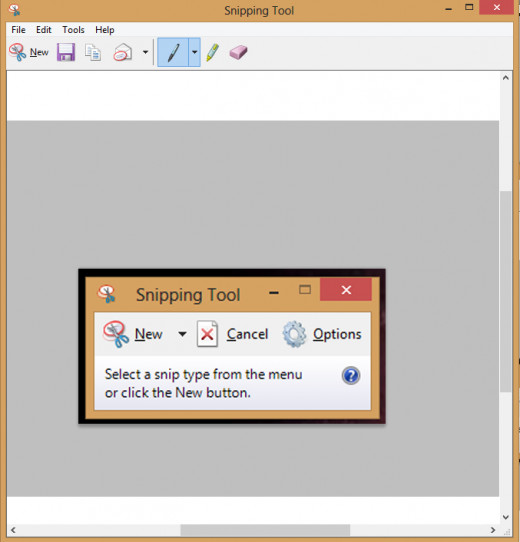
Once you’ve snipped something from your screen, the tool opens up to reveal other helpful options.
From left to right, the toolbar includes:
- New: In case you messed up your snip, and need to create another one. Note, clicking new will over-write your original snip if you didn’t save it anywhere.
- Save: To save your snips.
- Copy: To copy your snips.
- Share: Send your snipped image to someone else via email.
- Pen Tool: Use the pen tool to markup items on your snip. You can also change the color and weight of the pen from the drop down menu.
- Highlighter: Allows you to highlight important items on your snip.
- Eraser: This feature will only erase items you’ve added to your snip, such as pen or highlighting. It will not remove any part of the image capture.
What Can I Do With My Snipped Images?
When you finally capture an image with the Snipping Tool, what can you do with it? Well, lots of things. You’re really only limited to the programs you have installed, and your creativity.
It’s important to remember that the Snipping Tool only takes a temporary image of your screen. To keep it permanently, you either need to save the snip by clicking the save button, or you need to copy and paste it into another program for use.
Here are a few ways you can use your screenshots:
- Copy and paste your snip into an email. This is particularly helpful for sending error messages to tech support, or showing your co-workers exactly what item you are referring to.
- Copy and paste your snip into a Word Document, or other software, to include the image in the document you are creating.
- Copy and paste your snip into Photoshop, Paint, or other image editing software, and use it to create an image from, or add to an existing image.
- Save the snipped image and upload it to your website, as a reference for something you mention on a page or blog post.
My Other Technology Related Hubs
- Best Ways to Clean a Laptop
Voted Hub of the Day, Feb. 2013! You might be surprised to discover how many germs actually live on your laptop. This hub helps you fight back by giving you easy ways to keep your laptop clean and germ free. - Converting Microsoft Word .doc Files to PDF
Need an easy way to convert a Word document to a PDF? This hub is full of tips and tricks to help you turn Word, or similar documents, into PDFs, even if you don’t have Adobe Acrobat installed. - Free Voice Recognition Software in Windows 7
An introduction to the free speech recognition software that is built into Windows 7. Includes information on how to access the software, and some of the commands used. - Outlook 2010 Tips: How to Setup Auto Archive
Outlook 2010 Tips on how to setup Auto Archive; a feature designed to help Outlook run more efficiently. Includes a detailed description of the Outlook Auto Archive settings, and explains how to activate and apply this helpful feature. - ASUS K55A-DB51 Laptop Review
A review of the ASUS K55A series laptop. If you are in the market for a new laptop this might just be the one, considering all the bang you get for the buck. - Google Easter Eggs: Fun Hidden Quirks in Google Search
This hub reveals some of the fun Easter eggs hidden within Google search. - More Google Easter eggs: Items Hidden in Google Maps
Read this hub to find out about some of the cool Easter eggs hidden in Google Maps. Try them for yourself and have some fun. - How to Use the Wayback Machine on the Internet Archive's Website
A lesson on using the Wayback Machine to locate older versions of websites and/or to view websites which no longer exist.

